

How Plug-In Solar Works: Setup Guide
Updated: Jul 26
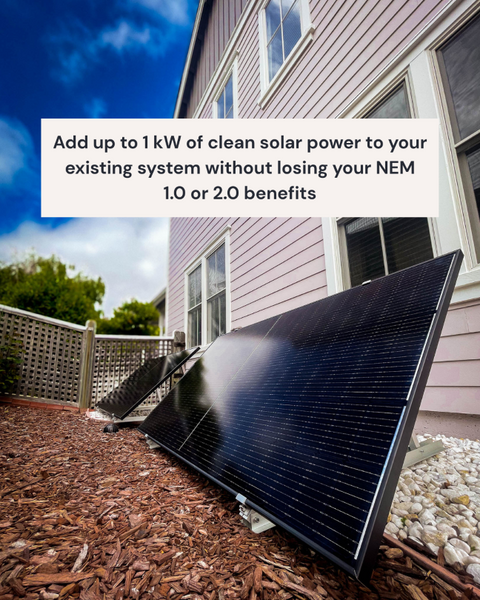
How Plug-In Solar Works: From Box to NEM Credits in 30 Minutes
In short: A plug-in solar kit consists of solar panels and a microinverter that converts sunlight into standard household electricity. You assemble the panels (Ikea-style, ~15 minutes), plug into a dedicated outlet with GFCI protection, and start generating electricity immediately. Any excess flows back through your meter as NEM credits.
You bought a Bright Saver NEM Expansion Kit. Now what?
This guide walks you through exactly how plug-in solar technology works and how to set it up, step by step. If you're still deciding whether plug-in solar is right for you, start with our What Is Plug-In Solar? guide. For the legal framework, see our NEM Expansion Rules guide. What Is Plug-In Solar? guide.
How It Works in 60 Seconds
Solar panels absorb sunlight and generate DC (direct current) electricity — the same thing your rooftop panels produce
A microinverter converts that DC into AC (alternating current) — the standard electricity your home runs on, the kind that powers your outlets, lights, and appliances
You plug the system into a wall outlet. The AC electricity flows into your home's wiring, just like power from the grid
Your home uses the solar electricity first, so you're buying less from the utility
If your panels produce more than your home needs, the extra flows back through your meter to the grid
Your utility credits you for that extra electricity at your existing NEM rate — the same way your rooftop panels earn credits
That's the entire system. Panels + microinverter + one plug = more NEM credits.
What You'll Need
Your Bright Saver NEM Expansion Kit (panels, microinverter, cables, mounting hardware)
A dedicated outdoor or indoor outlet with its own breaker and GFCI protection
A sunny spot with at least 4x6 ft per panel
About 30 minutes
No drill. No ladder. No electrician (unless you need a dedicated circuit added — many homes already have one).
Step-by-Step Setup
Step 1: Choose Your Location (5 minutes)
Find the sunniest spot available. In California, that usually means:
South-facing exposure is ideal (most direct sunlight year-round)
West-facing is second best (catches strong afternoon sun)
Avoid heavy shade from trees, buildings, or fences
Good locations: backyard (ground-mounted), patio, balcony (railing-mounted or propped against a wall), side yard, or south-facing garage wall.
Pro tip: Check your chosen spot at different times of day. You want at least 4 to 5 hours of direct sun daily for good production.
Step 2: Unbox and Inspect (5 minutes)
Your kit includes:
Solar panels (2 or 4) — 400W bifacial panels, 68" × 45" × 1.2" each, 45 lbs each
Microinverter (UL 1741 SB certified, CEC approved)
AC power cable with standard plug
Aluminum mounting stands and hardware
Quick-start guide
Inspect for shipping damage before assembly.

Step 3: Assemble the Panels (10 minutes)
Ground mounting: Unfold or attach the aluminum stands, angle 30 to 35 degrees toward the sun (optimal for California's latitude), and ensure stability.
Balcony or wall: Use included brackets or lean against railing/wall, secure with provided hardware.
Fence-leaning: Lean against a south-facing fence at a natural angle. Simplest setup.
Assembly is Ikea-level effort. No special tools needed beyond what's in the box. Panels don't need to be permanently fixed — many people adjust seasonally.
Step 4: Connect Panels to Microinverter (3 minutes)
Connect the panel's DC cables to the microinverter input. Connectors click into place and are weatherproof. Multiple panels connect in parallel with color-coded cables.
Step 5: Plug In (1 minute)
Plug the AC output cable into a dedicated circuit with GFCI protection. The system begins producing immediately. The microinverter LED lights up to confirm it's active.
Outlet requirements:
Must be a dedicated circuit (its own breaker, nothing else on it)
GFCI protection required
Weatherproof cover for outdoor outlets
If you're not sure whether you have a dedicated circuit, an electrician can check and add one if needed. This is typically a quick, inexpensive job.
Step 6: Verify Production (5 minutes)
Check the microinverter LED (green = producing)
Open the smartphone monitoring app to see real-time production
Watch your utility meter — you should see reduced consumption or the meter flowing back to the grid
What Happens to the Electricity You Generate
When your home uses more than you produce (most common)
Your panels produce 900W, your home draws 1,500W. Your home uses all 900W of solar and pulls only 600W from the grid. You save on the 900W you didn't buy.
When you produce more than you use
Your panels produce 900W, you're only using 200W. Your home uses 200W from solar. The remaining 700W flows back through your bi-directional meter to the grid, earning you NEM credits at your existing NEM rate. This is the core value of the NEM Expansion Kit — every excess kilowatt-hour earns credits just like your rooftop panels.
At night or on very cloudy days
Panels produce little or no electricity. You draw from the grid as usual. Your NEM credits offset those costs at true-up.
Understanding Your Solar Production
For a 2-panel system (~800W nameplate) in California:
Season | Daily Production | Monthly Production |
Summer (Jun–Aug) | 3.8 to 4.5 kWh/day | 115 to 135 kWh |
Spring/Fall | 2.8 to 3.5 kWh/day | 85 to 105 kWh |
Winter (Dec–Feb) | 2.0 to 2.5 kWh/day | 60 to 75 kWh |
Annual Total |
| ~1,200 kWh/year |
A 4-panel system produces approximately 2,200 kWh/year (not a full doubling due to inverter clipping on peak sunny days — about 10% annual energy loss, which is offset by higher production in mornings, afternoons, and cloudy conditions).
How NEM Credits Add Up
At Northern California NEM rates (~$0.30/kWh):
System | Annual Production | Annual NEM Credits | Payback |
2-Panel | ~1,200 kWh | $360/year | 4.6 years |
4-Panel | ~2,200 kWh | $660/year | 3.9 years |
SCE and SDG&E rates are higher (~$0.32 and ~$0.36/kWh), which means faster payback in Southern California and San Diego.
Monitoring Your System
The included microinverter connects to a smartphone app that shows:
Real-time production (watts being generated right now)
Daily and monthly kWh totals
Estimated savings
System health and alerts
Maintenance: Almost None
Clean panels every few months (garden hose rinse)
Check connections annually
Clear shade obstructions as needed (tree growth, new structures)
No moving parts, no fluids, no filters. Panels come with a 10-year warranty and typically produce for 20+ years.
FAQ
Can I install it myself?
Yes. If you can assemble Ikea furniture, you can set up plug-in solar.
What if I don't have a dedicated outdoor outlet?
An electrician can add one — typically a quick, inexpensive job. You can also run the cable through a window or door to an indoor dedicated circuit. Most California homes already have dedicated circuits in the garage (required by NEC code), laundry room, and kitchen — the garage is often the most convenient option since it's close to your backyard or side yard.
Cloudy days?
Panels still produce at 10 to 30% of rated output. California averages 260+ sunny days per year.
Power outages?
System automatically shuts off within milliseconds (anti-islanding safety feature). This protects utility workers and your home.
Will it work with my existing rooftop solar?
Yes. The plug-in system operates on a separate circuit. Your rooftop system keeps working exactly as before. Both contribute to your NEM credits through the same bi-directional meter.
Ready to get started?
Bright Saver's NEM Expansion Kits start at $1,499. A little Ikea-style assembly, plug in, and start earning more NEM credits the same day.
Free pickup from our Oakland or Los Angeles warehouses. Delivery + installation support available within 50 miles of Oakland for $349.
Bright Saver is a 501(c)(3) nonprofit. Our mission: Help Americans save on electricity bills by making plug-in solar affordable and accessible to all.